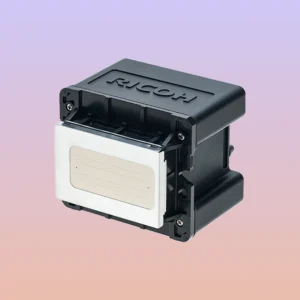
When a UV printer develops missing lines in the printhead, the printed result may show missing strokes in text, white lines in images, or uneven colors. In severe cases, it may even affect the delivery of an entire batch of products. Missing lines do not necessarily mean that the printhead is damaged. They may also be caused by clogged nozzles, abnormal ink supply, printhead contamination, incorrect equipment parameters, or inadequate maintenance. Troubleshooting in the correct order can reduce the cost of replacing printheads unnecessarily and help restore stable printing more quickly.
How to Determine Whether a UV Printer Printhead Has Missing Lines
When you notice abnormal print quality, do not remove the printhead immediately. First, print a nozzle check pattern and observe whether there are missing lines, broken lines, or faded colors to determine whether some nozzles are not ejecting ink properly.
Check the Nozzle Test Pattern
Run the nozzle check function provided by the equipment and observe whether the test lines are complete.
- A small number of missing lines in fixed positions is usually caused by clogged nozzles or printhead contamination.
- If the positions of the missing lines are inconsistent, check the ink supply, air bubbles, and ink delivery system.
- Large areas of missing lines may indicate severe clogging, abnormal ink supply, or printhead failure.
The nozzle test can help identify the problem and prevent color deviations or material-related issues from being misdiagnosed as printhead failures.
Distinguish Between Printhead Clogging and Printing Parameter Issues
Not all “white lines” are caused by the printhead itself.
- If the nozzle test shows fixed missing lines, first check for clogged nozzles and printhead contamination.
- If the nozzle test is normal but horizontal banding appears during printing, check the print mode, material parameters, and print resolution.
- If the image is misaligned, check the motion system, material positioning, and printhead calibration.
- If missing lines are accompanied by faded colors, check the ink supply system and ink level.
This step-by-step troubleshooting method helps reduce unnecessary cleaning and disassembly.
Common Causes of Missing Lines in UV Printer Printheads
Missing lines in a printhead are usually related to equipment usage frequency, ink condition, working environment, and daily maintenance.
Clogged Nozzles and Printhead Surface Contamination
During long-term operation, ink mist, dust, and cured ink may accumulate around the nozzle area, preventing some nozzles from ejecting ink properly.
- Residual ink on the printhead surface may affect ink ejection.
- Dust, fibers, and other contaminants entering the nozzle area may cause localized clogging.
- Reflected UV light may cure residual ink near the printhead, causing nozzle deflection or clogging.
- Dirty wiper blades, ink suction caps, and capping stations can reduce cleaning effectiveness.
The printhead and related maintenance components should be cleaned regularly to reduce contamination and clogging.
Abnormal Ink Supply and Working Environment
Air bubbles in the ink delivery system, insufficient ink supply, or abnormal ink circulation may all cause missing lines. Check the ink level and inspect the ink delivery system for air bubbles, leaks, or blockages. For white ink systems, pay particular attention to the circulation status to prevent sediment from affecting ink supply. At the same time, maintain suitable temperature, humidity, and air cleanliness. After a long period of shutdown, perform printhead maintenance according to the equipment requirements to reduce the risk of missing lines.
How to Fix Missing Lines in a UV Printer Printhead
After confirming missing lines in the nozzle test, handle the issue from the simplest to the more advanced steps. Cleaning functions may vary between brands and models, so specific operations should follow the equipment manual.
Clean the Printhead and Perform Another Test
For minor clogging, first use the standard cleaning function provided by the equipment.
- Run one printhead cleaning cycle, then print the nozzle test pattern again.
- Compare the positions and number of missing lines before and after cleaning to determine whether the condition has improved.
- If the number of missing lines decreases, continue with necessary maintenance, but do not repeatedly perform ineffective cleaning.
- If the affected area is large, follow the manual to perform a more intensive cleaning procedure.
After cleaning, check the nozzle test pattern again and resume batch printing only after confirming that the condition is stable.
Check the Area Around the Printhead and the Ink Delivery System
If cleaning produces little improvement, continue checking the hardware and ink delivery system:
- Clean residual ink and contaminants from the printhead, wiper blade, ink suction cap, and capping station.
- Check whether the ink delivery system is supplying ink smoothly and whether there are air bubbles or abnormal pressure.
- Check the ink level and waste ink system.
- If white ink is affected, focus on the white ink circulation and sediment.
- If the problem still cannot be resolved, have a professional inspect the printhead.
If a large number of nozzles are missing or the problem persists for a long time, do not repeatedly force intensive cleaning, as this may waste ink or damage the equipment.
How to Reduce Missing Lines in UV Printer Printheads
Establishing consistent maintenance habits can reduce downtime and consumable costs caused by recurring failures.
Establish a Daily Maintenance Routine
Perform a nozzle check before printing after startup to identify early signs of missing lines. Clean the area around the printhead, wiper blade, and capping station regularly. Perform printhead moisturizing and automatic maintenance procedures according to equipment requirements. Check the ink level, ink delivery system, and waste ink system regularly. Before a long shutdown, complete maintenance and storage procedures according to the manufacturer’s requirements.
Control Risks Related to Equipment, Ink, and the Environment
Printhead stability depends not only on the printhead itself, but also on the equipment, ink, and operating environment.
- Use compatible UV ink and avoid mixing different types of ink.
- Maintain suitable temperature and humidity, and reduce dust and ink delivery problems.
- Adjust the printhead height properly to reduce contamination caused by ink mist and UV reflection.
- Adjust the printing speed, resolution, and ink volume according to the material.
- Choose an equipment supplier with reliable after-sales service so that problems can be handled promptly.
Proper management of the equipment, ink, environment, and printing parameters can help reduce missing lines in the printhead.
After identifying missing lines in a UV printer printhead, choose the appropriate solution based on the test results and avoid blindly cleaning or replacing the printhead. For companies engaged in packaging, advertising, appliance panels, and industrial customization, stable equipment and comprehensive technical support are equally important. Springyprinter specializes in the research, development, and manufacturing of industrial UV digital printing equipment, providing equipment configurations, process recommendations, and after-sales services for different application scenarios.