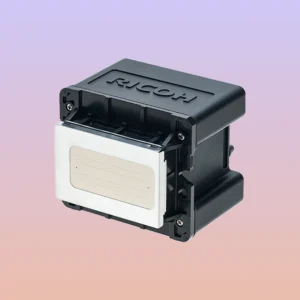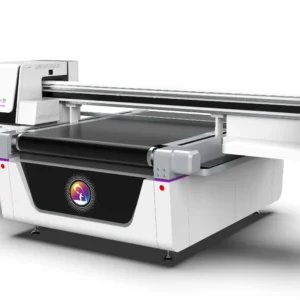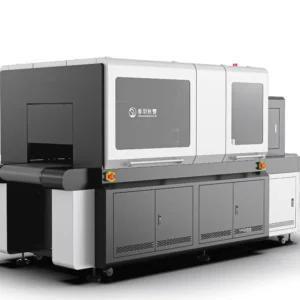
The purpose of daily cleaning and maintenance for UV printers is to keep the equipment running stably and extend the service life of the printhead and other components. However, if the cleaning is performed with incorrect techniques or certain details are overlooked, the process itself may create new problems. These issues typically do not surface immediately—they develop gradually over a period of continued use, and by the time they are discovered, they may have already caused material damage to the printhead, seals, or circuitry. Secondary problems caused by improper cleaning generally stem from three areas: incorrect selection of cleaning materials, cross-contamination during the cleaning process, and inadequate reassembly precision after disassembly for cleaning.
Common Secondary Problems in UV Printer Cleaning Operations
Effects of Cleaning Solution Residue on Seals and Circuitry
Cleaning solution residue is one of the most easily overlooked aspects of the cleaning process. When applied to the printhead surface, the cleaning solution dissolves and removes ink residue effectively. But if the operator resumes production before the solution has fully evaporated or without thoroughly drying the surface with a lint-free cloth, the remaining liquid seeps along the printhead surface in two directions. Downward seepage: the seal at the base of the printhead is typically made of rubber or silicone. After prolonged contact with organic solvents, the material initially swells slightly, which may actually improve the seal temporarily—and go unnoticed. Over the following weeks, however, the material ages and hardens, leading to ink dripping, air leaks, and poor ink retraction. At this stage, the seal will show visible discoloration and fine surface cracks. Upward seepage: the cleaning solution penetrates through the tiny gaps between the circuit wiring and the printhead housing. In mild cases, this causes intermittent short circuits—a channel suddenly drops out during printing, then recovers after a while. In severe cases, the contact points oxidize, contact resistance increases, and the printhead operating voltage becomes unstable. This type of damage is generally irreversible.
Several practices to reduce residue:
- After cleaning, gently blot the printhead surface dry with a clean lint-free cloth—do not press hard.
- Allow the cleaning solution to evaporate naturally for one to two minutes before capping the printhead or resuming printing.
- Regularly inspect the color and elasticity of the printhead base seal; replace it promptly if hardening or discoloration is observed.
- Use only enough cleaning solution to moisten the lint-free cloth—excess only increases the risk of residue.
Cross-Contamination from Shared Cleaning Tools
Cross-contamination occurs quite frequently in daily UV printer cleaning, yet it is rarely included as a standard direction in troubleshooting. The core issue is that contaminants on different parts of the machine vary significantly in composition. Using the same cleaning cloth back and forth across different areas effectively transports hard particles from one zone to another.
Contaminants on the printhead surface: primarily a thin film formed by dried ink, trace amounts of airborne dust, and material fibers. These particles are relatively fine and not particularly hard.
Contaminants on the printing platform: the sources are more varied—debris shed from printing materials, settled environmental dust, and partially cured ink mist particles from UV lamp exposure. Among these are relatively hard microparticles, such as mineral fillers from acrylic materials, metal chips, and wood fiber particles.
Consequences of poor cleaning tool management: if a cloth wipes the platform first and then returns to the printhead surface, the particles picked up on the cloth effectively abrade the printhead surface. The coating around the nozzle orifices requires extremely high precision, and accumulated micro-scratches will eventually affect ink droplet placement accuracy, manifesting as blurred print edges or deflected jetting. Sharing cleaning tools across different color channels creates another problem—titanium dioxide particles from the white ink channel can enter the color ink system through a shared cleaning tool, causing grayish color output or reduced color density. These issues often take a long time to trace back to their source.
To reduce cross-contamination, several measures are worth attention: use separate lint-free cloths for the printhead and the platform, storing the two sets of tools separately to avoid mix-ups; follow a cleaning sequence that handles precision components first and peripheral areas afterward, without reversing the order; dedicate a fixed set of cleaning tools to the white ink channel, replacing or thoroughly cleaning them before they come into contact with color channels; replace or flip the cleaning cloth as soon as the surface shows discoloration—the cost of lint-free cloths is far lower than the cost of printhead repairs.
Inadequate Assembly Precision After Disassembly for Cleaning
Operations such as removing a severely clogged printhead for soaking in cleaning solution, or replacing ink tubes and cleaning ink cartridges, all involve disassembly and reassembly. The disassembly itself is not technically difficult; the challenge lies in maintaining assembly precision when putting everything back.
Printhead mounting screws: the printhead baseplate must maintain parallel contact with the mounting bracket. If the screws are tightened on one side first or if diagonal tightening force is uneven, the gap between the printhead and the platform will be inconsistent. This results in prints that are sharp on one side and blurred on the other—adjusting the platform height will not resolve the issue, because the root cause is in the printhead mounting plane rather than the platform flatness. Screws should be tightened in a diagonal sequence across multiple passes, gradually reaching uniform tightness.
Ink line connectors: if an ink tube is not pushed in all the way when reconnected after cleaning, or if the sealing O-ring inside a quick-connect fitting gets pushed out of position during repeated plugging and unplugging, no abnormality will be visible immediately after reassembly. But after several tens of minutes or even hours of printing, air enters the ink line through the tiny gap, gradually causing ink starvation and fading. These delayed faults are particularly time-consuming to handle in remote after-sales support scenarios.
The post-reassembly checklist should not be skipped:
- Tighten printhead mounting screws evenly in a diagonal sequence—do not fully lock down any single screw in one go.
- Confirm that ink line connectors are pushed all the way in, with an audible or tactile click-in feedback.
- Run the ink circulation for three to five minutes after reassembly, checking all connectors for leaks.
- Replace any sealing O-ring that shows deformation or visible compression marks rather than reusing it-the cost of a new O-ring is far lower than the cost of cleaning up and reworking after an ink leak.
Chronic Printhead Damage from Inappropriate Cleaning Material Selection
UV printer inks come in hard, soft, and neutral formulations, each with corresponding cleaning solution solvent formulations. Using a cleaning solution that does not correspond to the ink system will not cause an immediate failure, but the cumulative long-term effects are persistent and difficult to trace back to the cleaning solution itself.
The problem of substituting industrial alcohol for dedicated cleaning solution: alcohol has some cleaning ability, is inexpensive, and is readily available. However, its solubility for the resin components in certain UV inks is limited. After wiping, the printhead surface looks clean, but in reality a very thin resin film is left behind. This film builds up with each successive cleaning cycle, covering the hydrophobic coating on the printhead surface and causing ink droplet ejection angle deviation. By the time print quality noticeably deteriorates, the resin film is already firmly adhered, and even switching to the correct cleaning solution and repeatedly flushing will take considerable time to remove it.
The problem of substituting cleaning solutions across different brands: cleaning solutions on the market are not universal formulations. Some are acidic, some are alkaline, and some contain specific surfactants designed for particular resin systems. Using one brand’s cleaning solution over the long term on another brand’s printhead may result in gradual corrosion of the internal channel wall material or changes in ink flow characteristics. When troubleshooting, people tend to suspect the ink first, then the ink supply system, then ambient temperature and humidity—going through multiple rounds before finally discovering that the wrong cleaning solution was being used.
Notes on selecting cleaning materials: Prioritize the cleaning solution model recommended or specified by the equipment manufacturer. A single printhead typically costs dozens of times more than the price difference between cleaning solutions. It is not advisable to substitute general-purpose solvents such as alcohol or acetone for dedicated cleaning solutions—the short-term savings may not offset the loss in printhead service life.
Before switching cleaning solution brands, perform a compatibility test: mix a small amount of the cleaning solution with the corresponding ink in a transparent container and stir. If clumping, separation, or flocculation occurs, the solution should not be used.
Poor Timing of Cleaning Operations
Not all cleaning needs to be performed immediately. Under certain conditions, cleaning at the wrong moment can turn a minor issue into a larger one.
Mild nozzle anomalies: a test print shows only one or two lines that are not perfectly straight, or a few missing dots—barely noticeable to the naked eye. Many operators instinctively go for manual cleaning right away. But mild nozzle deviation is not necessarily caused by a physical clog; micro-bubbles in the ink or a temporary ink supply shortfall in a particular channel can produce similar symptoms. Applying pressurized flushing immediately in such cases may push micro-bubbles deeper into the channel, or force loosely attached particles on the printhead surface into the nozzle orifices.
The recommended approach is to first run two to three automatic cleaning cycles and observe the trend on the test print: if each cycle shows improvement, continue with automatic cleaning; if there is no noticeable change after three or four consecutive cycles, then consider a manual cleaning approach.
High-humidity conditions: during the rainy season in southern regions or after summer storms, workshop humidity can exceed 80%. Under these conditions, disassembling the ink line or exposing the printhead for deep cleaning carries a high risk of moisture condensing on metal contacts and circuit board surfaces. After reassembly, everything may appear normal, but the condensed moisture droplets can cause a short circuit alarm the moment the machine is powered on. In high-humidity conditions, unless it is urgent, it is better to wait until humidity drops to a reasonable level before performing cleaning that requires exposing internal circuitry. Deep cleaning should also be scheduled during periods with lighter production loads—avoid disassembling the printhead for deep cleaning under time pressure when rushing to complete orders, as assembly quality is difficult to guarantee under such conditions.
Practical Significance of Reducing Secondary Cleaning Problems for Equipment Management
Reducing secondary problems caused by cleaning is not about cleaning less often or lowering standards. It is about standardizing operational details so that every cleaning session produces a positive outcome. When cleaning solution residue is properly handled, seals and circuit contacts are spared from unnecessary chemical exposure. When cleaning tools are dedicated to specific areas, micro-abrasion of the printhead surface and cross-contamination between ink systems are significantly reduced. When disassembly and reassembly follow the correct sequence and verification steps, rework caused by assembly deviations drops sharply. When cleaning materials correspond properly to the ink system, the long-term stability of the printhead’s internal channels is better assured. In day-to-day management, the question worth focusing on is not “was the cleaning done,” but rather “how was the cleaning done.”
Frequently Asked Questions
The test print looks worse after cleaning than before. How should this be handled?
In most cases, residual cleaning solution on the printhead surface has affected surface tension or has seeped into the nozzle orifices. Blot the printhead surface dry with a clean lint-free cloth, allow it to air-dry for one to two minutes, then print a test pattern to evaluate the result. If the problem persists, check whether the cleaning solution model is compatible with the current ink.
Should cleaning tools for different colors be kept separate?
It is recommended. The white ink channel in particular should use dedicated cleaning tools to prevent titanium dioxide particles from entering the color ink system and causing color deviation. If tools are limited, at a minimum, the white ink channel should have its own dedicated set.
What should be noted when switching cleaning solution brands?
Do not mix them directly. Drain the old solution completely from the ink lines and cleaning tools, flush the lines once with the new solution, then proceed with normal use. Before switching, perform a compatibility test: mix small amounts of the old and new cleaning solutions separately with ink, stir, and observe the dissolution behavior.
Does frequent cleaning shorten printhead life?
Proper and standardized cleaning does not shorten printhead life—it helps extend it. What genuinely damages the printhead are incorrect cleaning practices: using the wrong cleaning solution, applying excessive wiping force, powering on before residual solution has evaporated, and repeatedly reusing cleaning tools across different areas.
How can I confirm the printhead is correctly reinstalled after disassembly for cleaning?
Run the ink circulation for three to five minutes and check all connectors for leaks. Print a test pattern and check for overall uniformity and sharpness. If one side appears sharp while the other is blurred, check whether the diagonal tightening force on the mounting screws is even. Do not proceed with normal production until everything checks out.
Reducing secondary problems in UV printer cleaning operations is, at its core, not about creating a denser cleaning schedule, but about raising the execution quality of every single cleaning session. The evaporation time of the cleaning solution, the segregated use of cleaning tools across different zones, the verification of assembly after disassembly, and the correspondence between cleaning materials and the ink system—these factors are often dismissed as minor operational details in day-to-day equipment management, yet their impact on long-term equipment stability often outweighs the cleaning frequency itself.
For production workshops that run UV printers at high utilization, establishing standardized cleaning procedures is valuable. But what is more valuable is ensuring that operators understand the reason behind each step. There is a real difference in execution quality between someone who simply knows “wait for the cleaning solution to evaporate” and someone who understands “residual liquid will seep into the seal and cause it to deteriorate.” When operators can judge whether manual cleaning is necessary based on the trend of test print changes, rather than mechanically executing a fixed number of cleaning cycles, cleaning maintenance truly serves its purpose of safeguarding stable equipment operation. Long-term equipment stability is not maintained by any single deep-cleaning session, but is the cumulative result of getting every routine cleaning right.